Sunday, November 18, 2012

Kaboom Shrimp

 This  Shrimp concoction was developed by sheer trial and error and christened Kaboom Shrimp by my son Neil because of the heat and spice it exudes. It's freezing outside and I crave something spicy, tangy and rampant with fried garlic and olive oil. A Putanesca sauce comes to mind because it embodies all of the above but I don't want pasta, instead I want to wipe up the sauce with  some of that crusty Italian bread, fresh from the supermarket. A Putanesca sauce AKA a whore's sauce was named aptly after the  fishy, tangy aroma of this spicy sauce. Although my sauce is not unlike a Putanesca - I take poetic license and add whatever suits my mood. There's shrimp in my freezer and a jar of large pickled cherry peppers in the fridge sitting beside a jar of olives. I pull out all of this and get to work. No recipe but pure appetite at work.... it is truly worth a try!

1 packet frozen Shrimp tail-on
2 glugs olive oil
1 tbsp sliced garlic
2 dried chili peppers
2-3 cherry peppers
2 tbsp pickled olive medley sliced
1/2 can of crushed tomato
salt and pepper to taste
1 tbsp anchovy paste
dried or fresh basil to taste (ample amount)

1. Heat the olive oil in a wok and saute the shrimp and the garlic, adding the olives, peppers, chilies and tomato in quick succession once the shrimp is cooked and golden.
2. Season and add in the anchovy paste and basil. Taste and adjust seasoning. Serve with crusty bread.


Sunday, November 11, 2012

Bottoms Up!

A green pineapple sat on my kitchen counter for a few days and finally turned golden this morning. It took its time getting there but was disappointing nonetheless; hopelessly pale on the inside and way too tart to eat. But I didn't have the heart to throw it away, and so I turned it into an old fashioned upside down cake with a twist. I upped the ante with a few glugs of Malibu (white rum with a coconut flavor). This was inspired by the Pinacolada which marries the coconut and pineapple flavors well. To replicate the coconut flavor, I added sweet dessicated coconut to the batter. This definitely contributes to the depth of flavor and adds sweetness and crunch to an old favorite. It is essentially a cocktail and a dessert rolled into one. Cheers!


Recipe for a Pinacolada Upside Down Cake:
2 tbsp butter
1/4 cup brown sugar
4-6 fresh pineapple slices, cored
6 maraschino cherries
1 stick unsalted butter
1/2 cup sugar
2 eggs
1 tsp vanilla 
2 tbsp Malibu
1 cup flour
1 tsp baking powder
1/2 cup sweetened shredded coconut 

1. Preheat the oven to 350 degrees F. Melt the 2 tbsp butter in a cast iron skillet. Add in the brown sugar and shake the pan gently to mix the two. Remove from the heat and place the pineapple slices in the syrup and decorate with the cherries. 
2. Cream the butter and the sugar till light and fluffy. 
3. Add in the eggs one at a time, beating well between each. Add in the vanilla and the Malibu. Mix well.
4. Sift the flour and the baking powder and mix in. 
5. Pour batter over the pineapple and top with the shredded coconut. Bake for 30-40 minutes until the coconut is golden and a skewer comes out clean from the center of the cake. Cool, run a knife along the edges, place a large platter over it and flip over. Serve with table cream. 

Saturday, November 10, 2012

What a Ghastly Dish!

                       Recipe of the day: Head on a platter

What better way to celebrate Halloween than to create a costume in my kitchen?  Neil and I decided that he would be the dish of the day- his head would go on a platter. Neil played the part perfectly and won best costume at his friend Carly's Halloween party- much to my delight. It proved to be a worthy exercise putting the costume together and I couldn't resist sharing it!


Sunday, November 4, 2012

What color is your Lasagna?


Sometimes an assortment of vegetables cooked together can taste like yesterday's garbage, which is why I approached this Vegetarian Lasagna with caution. My kids are second only to Garfield when it comes to loving Lasagna; they begged for me not to destroy their favorite food by adding vegetables, but I was determined!
I tasted this version of veg Lasagna for the first time in Paris in a street side cafe and enjoyed it enough to try and reproduce it at home. It wasn't the stereo- typical Italian lasagna but a more stylized version with a definite Mediterranean flair. Simplistic and back to basic for the most part - no heavy meat sauces needed, it is in my opinion, a throwback to simpler times. I took the liberty of adding  in a couple of Med spices to give it authenticity. Za'atar ( a combination of herbs and sesame seed) and Sumac (a powdered spice that adds tartness) are not spices I use with regularity, but they add a great deal of flavor to this otherwise understated dish.
Surprisingly my kids liked it as much as I did. They ate silently, which is always a good sign and then they asked for seconds. I can barely believe it - they actually asked for more vegetables....

My recipe for Mediterranean Vegetarian Lasagna:
1 large eggplant sliced into 1/2 inch circles
2 zucchini sliced on the diagonal into 1/2 inch slices
2 large tomatoes
1 box no-cook lasagna or cooked lasagna sheets
1 jar of Marinara
1 tsp za'atar
1-2 tsp sumac
salt and pepper
olive oil for drizzling
1 cup Bechamel sauce
1 cup grated Italian cheese (Parmesan, Romano, Asiago)

1. Set the oven on broil. Brush the eggplant and zucchini with olive oil and sprinkle with salt and pepper. Spread on sheet trays and cook till golden on both sides. Dust with sumac and za'atar and set aside.
2. Heat the bottled Marinara and doctor it if you will, by adding extra garlic, herbs and a pinch of sugar.
3. Make a simple bechamel by cooking flour in butter and adding milk. Add the cheese to the sauce.
4. Grease a large oven proof dish and make layers of the pasta sheets, a combination of tomato slices, zucchini and eggplant and pouring over with the marinara.
5. Finish with a layer of pasta covered with marinara and the cheese sauce and bake at 350 degrees F for about a half hour or until the sauce is bubbling and the top is golden.

Monday, October 29, 2012

Squash the hurricane blues!


As Hurricane Sandy hurtles towards us full steam, and residents up and down the Eastern coastline evacuate their homes and scurry about gathering food and provisions, my sixteen year old looks on in disbelief and comments dryly "It's like the apocalypse!"

It sure feels like it. The skies are thunderous, gusts of winds fierce and the likelihood of being trapped indoors for the next forty-eight hours,very real. It also feels a bit chilly and my throat feels sore and scratchy. I root around in the kitchen and notice that my Butternut Squash sits prettily in a bowl like a Fall decoration but could potentially turn into delicious soup. This variety of squash has a natural sweetness, not quite as potent as a pumpkin but just enough. It also adds a lot of body and makes a thick soup. I peel and chop it into cubes and pull out a bottle of wine.
Recipe for Butternut Squash Soup with Red Pepper Coulis:
1 butternut squash peeled and chopped into chunks
1 cup chopped leek
1 - 2 Tbsp butter or olive oil
1 green apple peeled, cored and diced
1 tsp nutmeg
salt and pepper
1- 2 cups chicken broth
1 cup of white wine
2 tbsp cream

Red pepper Coulis (optional)
1 red pepper peeled and seeded- Roast it in the broiler or directly over a gas flame and puree along with a tsp of olive oil to a smooth puree. Add a pinch each of salt and white pepper.

1. Melt the butter in a pan or heat the oil and saute the  leeks till they are transparent and fragrant.
2. Add in the squash and apple and season with the salt pepper and nutmeg.
3. Add enough chicken broth to cover the veggies, cover and simmer on low till they are cooked thoroughly.
4. Add in the wine and more chicken broth. Blend into a smooth puree that is thick enough to coat the back of a spoon. Return to the heat and bring to a boil.
5. Serve topped with the cream and red pepper coulis.


Sunday, October 21, 2012

Pigging out !

Birthdays without friends, is like cake without icing; predictable and incredibly bland. As if on cue, my childhood buddy Uttara, weaves her way through rush hour traffic in a Manhattan cab, jumps onto a Greyhound and arrives at my doorstep with a perfect chocolate cake from my favorite French patisserie - Financier. Accompanying her is cuddly Arjun her nine year old, shouting "Happy Birthday" several times in the span of a few hours and waiting up until midnight to make it even more meaningful, even though he was practically sleepwalking by then.

Both mother and son (I know based on past experience) love pork chops.Uttara orders them so often at different establishments that she considers herself almost a connoisseur of pork chops. I happened to have 3 bone-in chops in the refrigerator and as soon as I got wind of her impending visit, I pulled them out and got to work. There was little time to fuss and preen so I set about making a quick birthday dinner - something that would go over well with her. The truth is that this is significantly easy dish to produce on short notice and the ratings are usually high. Uttara was biased, after all it was my birthday, but at one point, while she put a forkful of mashed potato into her mouth, she declared that it was a crime that I didn't have a restaurant featuring this pork chop on the menu. I take that as a compliment!

Recipe for Habanero and Rosemary encrusted Pork Chops with pan roasted veggies and cheesy mashed potatoes:
3 bone-in pork chops
1 habanero or any flavorful pepper (without seeds)
3-4 cloves of garlic
1 Tbsp olive oil
1 T red wine vinegar
sea salt to taste
freshly ground pepper
olive oil for grilling
For the gravy: 1/2 cup red wine+ 2 tbsp butter

1. Rinse the pork chops well and pat dry.
2. Grind all the ingredients and spread over the pork with a plastic spatula.
3. Put a couple of Tbsp of olive oil on a heavy grill pan and sear the meat till crisp on the edges and cooked thoroughly.
4. Remove the pork chops and deglaze the pan with the wine. once the wine is bubbling and reduces, whisk in the butter. Serve immediately.

Serve over mashed potatoes and pan roasted veggies.

Friday, October 12, 2012

Something's fishy!


I was in California last weekend; the skies were clear, the weather perfect and the beaches spectacular. I was in good company with my aunts Madhu and Meeta who plied me with food and love from the minute I set foot on their turf. On Sunday we found ourselves on Manhattan Beach where we proceeded to get thoroughly soaked. On the upside we managed to work up healthy appetites with our incessant chatter, laughter and running around, so before long we were munching on nachos and salsa at a local Mexican dive- El Sombrero. Predictably the decor consisted mostly of colorful sombreros and not much else. If it was great ambiance we were after, this was not the place, but the food was nothing to thumb your nose at.
Those fish tacos were as close as I've ever gotten to a Mexican fishing village. Simply executed with the fresh flavor of the fish topped with a Salsa Fresca and an amazing chili salsa made from scratch- those tacos hit the spot!
I was expecting a bottle of  Cholula (Mexican Hot Sauce) so when the waitress arrived with this bowl of eye-watering, freshly made chili sauce, I couldn't resist the urge to find the source of the heat- Fresno chili peppers. She even got me a few peppers and instructed me to dry them out and plant the seeds in my garden.

My recipe for simple fish tacos and Salsa Fresca;
Grilled white fish fillets
warm corn tortillas (use 2 for each taco)
diced tomato, onion, cilantro, jalapeno pepper
salt to taste
lemon juice
small dollop of honey

Place the fish fillets in the tortillas.
Combine the salsa ingredients including the honey, combine well and top each taco. Serve immediately


Monday, October 1, 2012

Eat, live, Party.....

Nobody can deny that NYC contributes more than its fair share to the field of gastronomy. A trip there definitely includes at least one memorable meal and although it's tough making a choice- with way too many options, some stick out more than others. What are the odds of experiencing the farm-to-table experience in the middle of an urban jungle?
David Burke kitchen in SoHo has a menu that rises to the challenge and does it convincingly well. We ordered a smorgasbord of artisan cheese, roast chicken, pork chop, Dorado, Branzino, octopus and bone marrow. Each dish was refreshingly original, well executed and farm fresh. The breads were aromatic and the butter beautifully presented on a slab of marble. We started with the Burrata, a fresh Italian cheese made from mozzarella and cream and served with grilled sourdough bread.
My kids ordered the roast chicken for two and were a bit worried when a whole roast chicken was presented to them and promptly whisked away. To their relief, it came back a few minutes later, sliced on individual platters topped with a leek and Gruyere quiche. Their verdict was that it was undoubtedly the best roast chicken they've ever tasted. The menu calls it "Farm chicken two ways for two days" but it was wiped out in record time.
The pork chop was artfully arranged with a tangy tamarind sauce and parsley onion rings. As if this wasn't enough, there was the addition of cumin flavored bacon. All of the flavors make for an unbelievably sweet and spicy explosion in the mouth.
I ordered the  grilled Branzino over Swiss chard, carrots and a candied mint sauce. The fish had a natural sweetness and was crisp on the outside and flaky on the inside.

My NYC hosts Uttara and Deepak never disappoint me when it comes to picking a restaurant. They could lead me blindfolded to any corner of the city and I come away bursting at the seams and happy.
After stumbling out of one of these places we move around the city like spry teenagers and party until dawn. On this trip, our childhood friend Nandita flew in all the way from Hong Kong to join in our merry making and all I can say is that I'm still nursing my hangover ; nature's way of telling us that we are definitely no teenagers!

Sunday, September 23, 2012

Muesli Cookies- Something to muse about......

Oat meal cookies are always the healthiest cookies -so why not Muesli? While cleaning out my pantry I found an unopened packet of Muesli and knowing my kids, it was most likely that it would remain that way. The muesli was loaded with nuts, oatmeal, dried berries and raisins and I had that "Eureka" moment as soon as I laid eyes on it. Unfortunately it wasn't easy finding a good recipe and so I made one up. I started by toasting the muesli in the oven along with a handful of pecans which add great flavor  and crunch to these sticky cookies. The rest was easy as I glanced through an old oatmeal cookie recipe and  adapted it as I went along. This was a fruitful experiment ( pun intended ) and blog worthy. If you try this at home- let me know how it goes......


Recipe for toasted Pecan Muesli Cookies:


3/4 cup toasted pecans
3 cups toasted Muesli
2 sticks unsalted butter (1cup)
1 cup sugar
2 eggs
2 tsp vanilla extract
1 tsp ground cinnamon
1 tsp baking powder
1 tsp salt
1 1/2 cup AP flour

1. Preheat the oven to 350 degrees. Prepare 2 sheet pans with parchment paper.
2. Cream the butter and the sugar until light and fluffy scraping the bowl from time to time.
3. Add in the eggs one at a time, beating well between each. Add in the vanilla.
4. Sift the dry ingredients together and mix in.combine well but do not over mix. Fold in the muesli and pecans last.
5. Using a large ice-cream scoop, scoop out the dough and set them at least an inch apart.
Flatten each ball with moistened fingers.
6. Bake for about 15 minutes or until light golden in color.


Sunday, September 16, 2012

Sixteen Candles


My son Raoul is sixteen today. Although he is not celebrating it with the same intensity as a girl would her Sweet Sixteenth and is happy to simply take his friends bowling and give them pizza, he still wants me to bake him a cake. For me it feels like he is on the threshhold of adulthood with driving permits, endless activities and planning for college, looming ahead. While all of this fogs up my brain I am well aware that his expectations are high. The cake can't be anything less than spectacular!

Chocolate is our family's preferred flavor when it comes to cake, dark chocolate with a hint of coffee being Raoul's all time favorite. The Giardelli cookbook has some of the best chocolate recipes although I cheat and use Nestle's bitter sweet chocolate bits instead of the recommended Giardelli chocolate. So I picked the Flourless Mocha Torte and decorated it with peanut butter bits. The results were exactly what I'd hoped for....

Recipe for Flourless Mocha Torte:
6 oz bitter sweet chocolate
1 tbsp instant coffee mixed into 3 tbsp boiling water
6 large eggs separated
2/3 cup white sugar
1/4 tsp salt

Frosting:
4 oz milk chocolate
1 tbsp instant coffee dissolved in 1/4 cup boiling water
2 cups heavy cream
Peanut butter chips for decorating (optional)

1. Preheat oven to 350 degrees and grease 2-  8" pans. Line the bottom of each pan with parchment paper.
2. Melt the chocolate in a double boiler. Add in the coffee and mix well. Cool to room temp.
3. Whip the egg whites till doubled in volume. Add in 1/3 of the sugar. Whip till it forms stiff peaks.
4. Whip the yolks in a separate bowl with the remaining sugar and the salt.
5. Add the chocolate/coffee mixture into the yolks.
6. Fold the egg whites slowly into this mixture well until it is evenly mixed through.
7. Pour into the tins and bake for 25 mins. Leave in the oven for an additional 5 minutes. Cool the cakes and ice.

For the frosting:
1. Melt the chocolate in a double boiler and mix in the coffee. Cool completely.
2. Whip the cream until stiff peaks form. Fold in the chcolate/coffee mixture and ice cake. Decorate with the peanut butter chips.

Note: I put sixteen candles on the cake; trick candles that keep ligting up. It was a laugh until the candles almost set fire to the cake!


Saturday, September 8, 2012

Pardon my French....


All streets in Paris invariably lead to a neighborhood creperie tucked away discreetly in some corner.  I find that the easiest way to find one is to follow your nose; the buttery smell of a freshly made crepe is unmistakable and often irresistable  These hole-in-the-wall Creperies usually tend to be family run enterprises and although the menus are limited, and there is barely enough elbow room between the cafe tables, one is free to choose from a list of savory and dessert crepes, each one worth at least one try. My kids tend to pig out on the Nutella and jam filled crepes leaving telltale drips all the way down their chins. I've worked my way down the menu over time but there're a couple that I favor. One of them happens to be the Crepes a l'oeuf  Fromage et Jambon or the ham and Cheese Crepe topped with an egg. Hearty and yet strangely delicate in appearance, this is one meal that 'll keep you happy for a few hours. 
Try it at home. You don't have to be in Paris to eat well......!

Recipe for Crepes :

1 1/2 cups Milk
2 eggs
1 cup flour
1/4 tsp salt
 2 tbsp butter melted
Ham, Gruyere cheese and eggs for topping
    
 1. Combine all but the melted butter in a food processor and keep at room temperature for an hour before using. Add in the butter at this time. 
2. Heat a flat pan (9") over moderate heat and brush on a thin layer of butter. Pour on the batter with a ladle and spread evenly, pouring off any excess batter. Cook till golden and until the edges curl up slightly. Flip over and cook the other side. 
3. Place the  cheese, topped with the ham and cook the egg over this until the cheese is melted and the egg is cooked through. Serve immediately


Friday, August 31, 2012

In Memory of my Dad....


I apologize to all my readers for the long silence. When I set out in early July for a trip to Europe and India, I was ready with my camera and notebook to keep you abreast of the food adventure I was about to embark on, after all I was heading for Paris, Mecca for foodies like you and me.
I was not prepared when my Dad passed away quite suddenly on my arrival in India. Although he had been ill for a prolonged period, it still came as a shock and was difficult to come to terms with.
If my mother taught me my cooking skills, it was my dad that taught me to eat healthy. He had a fetish for eating what was fresh and seasonal, and often shopped in the local markets back home as well as on his visits to me in various parts of the world. He would binge shop enough to drive my mother and me crazy. Sometimes it was way too much to fit in the refrigerator!


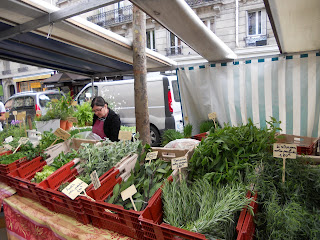
Now more than ever, open markets bring back memories of my dad and on my way back via Paris, I felt compelled to stop by one. I was temporarly comforted by the thought that he had been fortunate enough to travel the world and enjoy the best that life had to offer. He had an incredible lust for life and a passion for good food and drink which he instilled in me. Hopefully I will continue to do the same for my children.

Saturday, June 30, 2012

Starting from scratch

Mexican food is loaded with flavor and even the best cooks sneak in packaged Taco or fajita seasoning every now and then in a crunch, but making a marinade from scratch is not all it's made out to be. With the right ingredients at hand - it's a cinch. There's a world of difference in the finished product and there are no nasty preservatives to deal with. This particular marinade can be used on chicken or pork and once the flavor soaks in, all you need is a hot grill. The end product can be eaten as a wrap with sauteed peppers and onions, in a salad or over rice and leftovers can be frozen for a rainy day. Most of the unique flavor comes from the Mexican peppers; these are a imperative for an authentic flavor. The Achiote or Annato seeds are used more for their color.

Recipe for Mexican Marinade:
4 chicken breasts or pork chops
1 onion cut into chunks
3-4 cloves garlic
handful of fresh thyme
1/4 cup vinegar
4 bay leaves
1 teaspoon Achiote seeds plus 2 tbsp oil
1 tsp nutmeg
1 tsp cinnamon
2 tsp coriander powder
1 tsp clove powder
1 tsp oregano
salt and pepper
2 Ancho peppers
2 Guajillo peppers

1. Heat the oil and throw in the annato seeds. Remove from the heat immediately and set aside. Remove the seeds when cooland dicard them. Only the oil is used for color
2. Soak the peppers in hot water till plump, remove stalks and seeds and grind to a paste.
3. Grind all the ingredients to a paste and place in a glass bowl with the chicken or pork. Allow it to marinate ovenight for full flavor. Grill or cook in the oven. Slice and use as needed.


Sunday, June 24, 2012

Stir Crazy

On a recent visit to my eye doctor, I was told in no uncertain terms that I needed to up my leafy green intake drastically. I found myself turning to spinach most often but got easily bored - spinach can be tasteless and mundane if eaten on a frequent basis. My kids despise kale and Collard greens and so the best course of action was to visit the local Korean Market. It's mind boggling spread of greens really did boggle my mind and I would willingly have bought masses of it. Sadly,I picked only a few, since they tend wilt and lose their food value quite quickly in the fridge. Choy Sum was my first choice. These tender Chinese baby greens with darker outer leaves make for the best stir fries. I threw in a box of Shitake mushrooms and some chili black bean paste with customary foresight. I could already taste it in my head. in a matter of minutes I was on my way to bliss and 20/20 vision.

Recipe for stir fried Choy Sum:
1 tablespoon sesame oil
4-6 heads of Choy sum, sliced vertically and rinsed under running water
1 cup of shitake mushrooms
2 cloves of garlic sliced fine
1 tablespoon chili black bean sauce

1. Heat the oil in a wok over high heat and saute the garlic, followed rapidly by the Choy Sum, shitake mushroom and bean paste.
2. Stir rapidly over high heat and serve immediately with rice or noodles.

Saturday, June 16, 2012

Got Wasabi?


I learnt to make sushi way back in culinary school but like I said to my friend Midori - I was taught by an American. It wasn't authentic enough. So she obliged by inviting me to a sushi rolling lunch. She had her mise en place ready to go. There was still warm cooked rice, thin omelets, cucumber spears, imitation crab meat, cooked shrimp, sliced avocado and iceberg lettuce. She gave me some inside information, not something I am likely to get from an American chef instructor, but small tips and tricks that give it an edge. For instance, I was quite amused when she handed me a Japanese paper fan and asked me to fan the rice while she mixed it with the seasoning. She explained to me, "It is important for the rice to be warm when you mix in the seasoning but cool when you make the sushi." She even sent me home with a bag of the seasoning and a sushi mat! This wasn't the most elaborate sushi, but my favorite- California Roll. Midori did an excellent job of teaching me how to roll the sushi without it being all over the table and floor. Under her supervision it actually stayed where it was supposed to. The best part was that it tasted great too.

Midori's California Roll:

8-10 sheets of Nori
2 cups rice
1/2 packet Sushi Flavoring ( powdered or liquid)
2 eggs made into omelets
iceberg lettuce leaves
cucumber spears
imitation crab meat
cooked shrimp
avocado slices
Mayonnaise ( optional)
1. Combine the rice and seasoning while the rice is hot/warm, and cool rapidly before using.
2. Place nori on the mat and spread with a thin layer of rice.( You can use plastic wrap on the mat if you intend to keep it in the fridge for a while)
3. Place your pick of ingredients in the center in a line. Fold away from you and press the end down as close as possible over the filling and roll and press again to seal the ends. Give it a squeeze with bothe hands to tighten the roll. A few drops of Japanese Mayo add a creamy flavor to the Sushi rolls.
4. Cut the roll into bite sized portions using a sharp knife that is wiped with a damp towel between each cut. Bring on the wasabi and soy!


Sunday, June 10, 2012

Wonton Whisperer

Wantons have long been a favorite food for me. Call them potstickers, Momos, Gyoza, Dimsum or whatever inspires you. Although there is a distinct difference between each, they are similar in more ways than one. Pillows of spongy flavorful meat encased in a dough exterior, these make for great finger food for all ages and events. I make these several times a year and freeze them to be used as needed. One becomes adept at the art of wanton making, purely through practise. At first it appears to be hard work but by the third time a deftness sets in and the speed improves perceptibly.
The one thing that bothered me was that I often found the meat to be less than moist. That is, until my friend Jen Golay let me in on a secret ingredient. Believe it or not it's butter! The results were markedly improved. The fat from the butter keeps the meat juicy and melt in the mouth.
On my latest attempt, the meat outlasted the wrappers and I was forced to make do with spring roll wrappers. I cut the large wrappers into quarters and to my delight made the crunchiest wantons of all time. My kids loved it!

Recipe for Pork Wontons:
2 cups ground pork tenderloin
1 large red onion minced
1 Tbsp ground ginger
2 tbsp chicken broth
1/4 stick of butter (4 tsp)
salt to taste
fresh cilantro minced

wanton wrappers- 1 pack

1. Combine the ingredients, mix well and chill for a few hours allowing the meat to marinate in the juices.
2. Spray steamer with Pam and form the wantons by placing a teaspoon of the filling in the center and folding the two halves together. Seal by dampening the edges and pinching them together.
3. Steam for 15 minutes and serve or pan fry to serve.

Saturday, June 2, 2012

Soup Nazi


My youngest- Neil could survive on Broccoli Cheddar Soup. He would happily eat if for breakfast lunch and dinner, but it needs to be made a certain way. Even as an eleven year old, he can turn into quite a prima donna when his favorite soup is made carelessly and has absolutely no qualms about pointing out the inadequacies in great detail. There's no holding back! I tend to cook on autopilot and don't really bother with exact measurements and am more likely to simply eyeball the ingredients and it works most of the time. Not with the Broccoli Cheddar soup!
The downside is that this soup can be very calorific with cream and cheese playing an integral role in the consistency and taste. So I devised a way around this with the aid of my trusty Vitamix. A Vitamix, for those of you that haven't ever used one, is a new age blender with super powers. Its razor sharp blades have the ability to pulverize at the press of a button and within seconds. It also thickens as it purees and left on for more than five minutes actually cooks the soup to the point where it comes out steaming without overcooking. This way all the nutrients are sealed in. The secret is that I make do without the cream and nobody can tell the difference.
My recipe for Broccoli Cheddar Soup:
1 head of broccoli, separated
1 cup chicken broth
1 cup of 2 % milk
1 cube chicken bouillon
1/2 cup grated carrots
1/2 cup cheddar cheese
salt and white pepper to taste
1. Place the broccoli florets in a dish and microwave for 3-4 minutes or until cooked. They should be bright green and tender but not soft.
2. Heat the milk and the chicken broth separately.
3. Setting aside some of the broccoli crowns, combine the rest with the bouillon, milk and broth and blend to the desired thickness. Taste and adjust seasoning.
4. Cut the remaining broccoli crowns into small sections. Pour the soup into individual bowls
and add in the cheddar, broccoli and grated carrots.
5. Bring to a boil or serve as is immediately.

Sunday, May 27, 2012

Speakeasy and hang loose!

Memorial Day weekend is always a crazy whirlwind of activities but more so this year because I was summoned to New York at short notice. Summoned with vivid descriptions of a fantastic dinner at the Macao Trading Co. in Tribeca, a unique restaurant that reflects the best combination of Portuguese and Chinese cuisines indigenous to Macao, just off the coast of Hong Kong. So there I was, overnight bag in hand at her doorstep. The food was impeccable and memorable but not as much as the bar hopping that ensued.
We hit several venues as the evening progressed each one more bizarre than the last. The Biergarten, a gay bar (this was not a deliberate or sober decision), a Blues bar and a Speakeasy called The Raines Law Room. This last one fit the New York stereo type perfectly with its pseudo Nineteenth century Prohibition era decor and ambiance. New Yorkers, like no other race on the planet, thrive on the unique and especially on fantasy and this place more than ever fit the bill. The rooms were divided into sections with translucent curtains and even the furniture is a throwback with dark velvety chaise lounges and wing chairs. We almost expected a cabaret troupe to make an appearance but were left to entertain ourselves at the expense of the waitstaff who looked like they had stepped out the backdoor of an off Broadway production of "Thoroughly Modern Millie". The only way to get their attention was to tug on a elasticated pull in the wall.
The Mixologist in my opinion is this bar's best asset. The cocktails are amazingly complicated and appear to have several perceptible layers of flavor. My pick was the San Luis Cup, a concoction of Mezcal, Ancho Chili syrup, muddled lime and cucumber, sea salt and black pepper and served over cracked ice. Mezcal, like Tequila, is extracted from the Agave plant but is distinctly different. The smoky Ancho chili added a distinct smoky flavor and a definite kick, something of a novelty for me. At $ 13 a piece this was not a place for binging but more for teasing the taste buds. Delicious as they were the glasses were artfully filled with ice with only a small doze of the real deal, leaving one craving for more. Like the Chef's beautifully decorated plate with only a bite or two, this bar gives you Ambrosia in minute doses and leaves you wanting more...

Saturday, May 19, 2012

Stick to your ribs!

Summer time is my favorite time of year because its all about being outside. The days are longer and whether I'm gardening, hanging with the kids or simply sitting in a shady spot and enjoying the summer breeze, it makes me happy. It's also time to fire up the grill for many backyard barbecues. It's undoubtedly the best way to entertain but I tend to cook on the grill any time. It's super healthy to begin with and I love the charred bits on a slab of meat, that only comes from cooking outdoors. Its easy cooking especially since I make my son Raoul, chef for the day and I volunteer for the cleanup since there's hardly any!
Baby back ribs are the best kind when you're out buying the ribs but the trick is to cook them very slowly so that the fat renders. Which means that over low heat, the fat tends to melt away and the meat becomes succulent and tender. Quick cooking leaves large chunks of blubber interspersed with the meaty parts and I dislike that immensely. Plus the meat tends to remain tough and chewy.
I tend to get adventurous when I get my hands on ribs. Sometimes I go Asian and at other times I simply stay local. Americans slather on BBQ sauce and it tastes fantastic, the only hitch is that I am opposed to bottled sauces and so I make my own....

Recipe for BBQ Baby Back Ribs:
1 slab of ribs
1 large onion minced
4 cloves garlic minced
2 tbsp oil
1 cup ketchup
1/2 cup vinegar
1/2 cup brown sugar
1 tbsp Worcestershire sauce
1 tbsp coarse mustard
1 tsp paprika
salt to taste
2 bay leaf
a few splashes of Hot sauce (optional)
1. Heat oil in a heavy pan and saute the onion and garlic till it caramelizes and add in the other ingredients.
2. Simmer the sauce over low heat till the mixture starts to bubble gently and becomes thick enough to coat the back of a spoon.
3. Allow it to cool completely. Remove about a cup of it and brush onto the ribs on both sides.
Keep the remainder for later.
4. Grill the ribs and brush on some of the remaining sauce before serving.

Raoul brushes on the Marinade.


Monday, May 14, 2012

Small bites... big flavors!


Last week my childhood friend Jen (AKA Golay) flew in to spend a couple of days with me. Although we haven't seen each other in a few years, we often have transatlantic conversations that leave us bleary eyed and groggy and quite likely enough to put John Moschitta to shame.
Sadly her night is my day and vise versa since she lives in Hong Kong, but this does little to deter us once we get started. It leaves the rest of our families in awe when we switch relentlessly and effortlessly from one topic to the next for hours on end. It was during one such conversation that she mentioned a desire to taste my Middle Eastern cooking. In case you're wondering - it's not because I'm famous for my Middle Eastern food but more because she had just returned from a trip to Dubai and was craving what she had left behind. Once her trip here was planned I decided that I would make it a point to give her a taste. There was one little technicality-I wasn't sure of what time she was arriving and so I decided to play it safe and create a platter that she could nosh on any given time of the day. So here's what I did...
I toasted pita bread to go with the hummus, bought picked olives and hot peppery Mediterranean salami at the deli and put together a platter. The falafel and beef kebabs were made from scratch and they helped add depth to an otherwise simple luncheon. She enjoyed the kebabs immensely and we managed to tuck in even as we chattered non stop until 2 A.M. the next morning!

My recipe for the Beef Kebabs:

4 skewers soaked in water for an hour
2 cups ground beef ( Burger meat)
1 tsp coriander powder
1 tspcumin powder
1 tsp chili powder
1/2 tsp garam masala powder
1 tablespoon ginger paste
1 teaspoon garlic paste
salt to taste
2 tablespoons fresh cilantro
1 teaspoon oil

1. Mix all the ingredients until well combined and divide into 4 parts. Stick the meat mixture by the handfuls onto each skewer, making sure to keep it as even as possible.
2. Grill on all sides on a barbecue pit or under the broiler until golden brown.
Serve as part of a platter or with mint chutney.


Saturday, May 5, 2012

Sink your teeth into this...

Chocolate is good for you. Every fashion magazine shouts about it and the caption is usually positioned next to a skinny super model's tiny waistline. I'm on the fence with the logic, but who can say no to a good chocolate chip cookie? So I feel compelled to agree. Either way these cookies are hard to resist and I justify the indulgence with a few extra sit-ups. Besides, this particular recipe makes the grown-up version of a regular chocolate chip cookie. Dark, nutty and moderately sweet, they are quite sophisticated and what I consider to be, the cookie version of dark chocolate. This is not a cookie reserved for a quick sugar high but more suited as an accompaniment to a good cup of coffee or in my case....dessert. Rich in flavor and heavy with walnuts and chocolate chip, a little goes a long way.

My Recipe for Dark Chocolate Chip Walnut Cookies:
2 sticks unsalted butter ( 1/2 lb) at room temperature
1 cup light brown sugar
2/3 cup sugar
1 tsp vanilla
2 eggs
1/3 cup dark cocoa
2 flour
2 tsp baking soda
1/2 tsp salt

1. Preheat oven to 350 degrees F. Cream the butter till light and fluffy. Meanwhile prepare 2 sheet pans with parchment paper.
2. Add the sugars and continue beating till creamy.
3. Add in the eggs, one at a time beating well between each till completely blended.
4. Mix in the vanilla and cocoa and continue beating.
5. Sift the flour, baking soda and salt. Stir in the flour mixture till well combined.
6. Using an ice cream scoop, spoon batter onto the sheet pans, leaving a couple of inches between each. Flatten the tops gently with finger tips.
7. Bake for 10-12 minutes tops. Remove trays from the oven and cool.


Saturday, April 28, 2012

Cooking 101


Cooking can become a drag no matter how much you love to cook or how skilled you may be in the kitchen, and so an opportunity to brush up those skills was welcomed by members of my Zumba class( yes, I do have to work off those calories) Pam, Julienne, Peggy, Joe and Josie signed up for it and proved to be an enthusiastic audience. Cooking is really all about sharing and I was delighted to share my time, recipes and food with this group of savvy cooks.
The menu consisted of Pan seared chicken au jus with herb mashed potatoes, an easy to prepare meal with possibly great end results. Dessert was a rich Crème Brulee. So I rolled up my sleeves and got busy while they got comfortable with a glass of wine, olive bread, home-made baba ganoush and Joe's freshly baked focaccia.


The chicken cooked tender and juicy, thanks to the brining and I got Joe to mash the potatoes with the ricer while I minced assorted fresh herbs from my window herb garden and prepared the jus. Once the chicken was out of the oven, I plated it over a bed of mashed potatoes and spooned the jus over it. The meal was well received but the Crème Brulee was the most fun. I had made a batch earlier so that it would be chilled to the right temperature. Torching the sugar was the highlight and there was much amusement as Josie tried her hand at it.

It was a great way to spend an evening with an interesting group of people. For me, it was a milestone; teaching people to cook has been on my bucket list. It's a win win situation- doing what I love most and being appreciated for it.


Recipe for Pan-seared Chicken au jus :
4 boneless skin-on chicken breasts
Brine: 2-3 T kosher salt +1 C water
Minced herbs: thyme, rosemary, and parsley
Pinch of Paprika, onion powder, salt and pepper
Flour
¼ C Oil
1 T butter
1 C white wine

  1. Rinse the chicken breasts and brine for at least 2-3 hours.  
  2. Remove from the brine. Place in a Ziploc bag with the flour, paprika, onion powder, herbs, salt (optional) and freshly ground pepper.   
  3. Heat oil in the pan and sear chicken till golden on each side.   
  4.  Remove and place on an oven tray. Finish in the oven at 350 degrees for 15-20 minutes.
  5.     Meanwhile, prepare the Jus by adding the shallots and garlic to the pan. When this is fragrant add in the wine. When it reduces, add in the butter.
  6.     Pour over the chicken and serve immediately.


Recipe for Herb mashed potato
4-6 Yukon Gold potatoes cooked
3 T butter
½ cup half and half
salt and white pepper
mixed herbs

  1. Keep the potatoes hot and push them through a food mill adding cold butter with each batch.
  2. Season with salt and pepper and mix in the herbs. Keep warm.
  3. Add the half and half and mix in well before serving.


Sunday, April 22, 2012


A Pork roast really doesn't need much help in the flavor department, but a surefire way of raising the bar is to stuff it. The effort is minimal and the difference phenomenal. It also helps with keeping it moist, as pork has a natural tendency to dry out in the oven. The range of possibilities is quite remarkable and you can determine the filling based on your mood...
or on what's in the fridge. Mushrooms, bacon, peppers, apples, nuts, goat cheese, figs; the choices are vast and you can get impulsive and create an amazing version of your own.
This one's a crowd-pleaser whichever way you go.

Recipe for Stuffed Pork Tenderloin:
1 (1lb) pork tenderloin
1 tsp paprika
Salt and fresh ground pepper
coarse ground mustard
herbs of choice ( I used fresh thyme )

Filling:
2-3 cloves garlic sliced
2 T olive oil
1 shallot diced
1/2 cup diced ham
1 cup cooked broccoli rabe chopped ( or spinach)
herbs of choice
crushed red pepper
salt and pepper
2 tbsp olive oil

1. Rinse the tenderloin and pat dry.Cut a slit down the center. Rub with the seasoning, spices and herbs inside out.
2. Heat the oil in a pan and saute the garlic and shallots till fragrant.
3. Add the broccoli rabe, herbs and seasoning. Cook briefly and cool.
4. Fill the tenderloin and tie with kitchen twine. Heat the oil in an oven dish and brown the meat on all sides over high heat. Cover and stick in the oven at 350 degrees for 20 -25 minutes or until the center is no longer pink. Rest for a few minutes, slice carefully and serve.


Sunday, April 15, 2012

Nuts about Chocolate cake!

Chocolate cake is probably the world's most popular dessert and even thought everyone has their own recipe and interpretation, what it boils down to is a mouthful of gooey chocolate cake.
Most recipes are fairly complicated; eggs are whipped separately and the egg whites need to be folded in carefully at the end, making sure that the batter doesn't collapse, which can potentially ruin the cake. Done right - they taste like a slice of heaven.
This recipe is relatively easy and tastes just as good. Sometimes there are days when I just don't feel inclined to stand in the kitchen for hours baking, so I take short cuts and I don't think there's anything wrong with that - I get my cake and eat it too!
This is an interpretation of a recipe by Nick Malgieri from his chocolate cookbook. Minute changes as they are, I like taking liberties and playing with recipes and the end product is usually more in my personal style. in this recipe I have used just brown sugar and I toasted my almonds which added a nice crunch and flavor to the cake.

Recipe for Fudgy Almond cake:

1 cup sliced almonds + 1/4 cup for the topping
2 sticks butter (1 cup)
1 cup dark brown sugar
1 -2 tablespoons instant coffee
1/2 tsp almond essence
4 eggs
1 cup flour
8 oz dark chocolate melted

1. Preheat the oven to 350 degrees. Spread the slivered almonds on an oven tray and toast till crisp and golden. Meanwhile spray a 9 inch cake pan with cooking spray.
2. Beat the sugar and butter with an electric mixer until fluffy and light.
3. Add in the eggs, one at a time, beating and scraping the bowl between each.
4. Mix in the coffee and almond essence and finally the chocolate. The batter should be smooth.
5. Add in a cup of the almonds and the flour and combine well. Avoid over-beating as this will make the cake more dense and bready.
6. Pour the batter into the pan and bake for 30 to 40 minutes. The centre may appear soft - this is okay. it should not be runny.
7. Cool and remove from the pan and cover in ganache. Top with the remaining toasted almonds.

Ganache:
Equal parts whipping cream and chocolate
Heat the cream in a pan and bring to a quick boil. Remove from heat and add in the chocolate. Allow it to sit for a few minutes and mix well. This will thicken as it cools.


Friday, April 6, 2012

Easter Dinner with Pam.... Home-made Sugo


Most people get Easter eggs from the bunny but I got a fabulous Sugo from my friend Pam. Italian Americans rarely need an excuse to bring out their XXL saucepots and exercise their natural cooking skills. Families gather, eat, drink and celebrate together, so when Easter comes around, kitchens sizzle and bubble in preparation. Pam is no exception and gets busy with a traditional Sugo, something she declares is a fairly gargantuan task and one she tackles a couple of times a year at best. She does it with the same energy and enthusiasm as she does her Zumba classes. ( She teaches Zumba, Spin and Piloxing in her free time!) Not only does she cook this elaborate meal, but she writes the recipe down, takes some pretty cool pics and brings me a bowl of the finished product to taste.
The term Sugo is best described as a sauce that is flavored with meat and served over pasta. Tomatoes usually play a large role but it is the meat that takes center-stage. Pam uses meatballs, Bracciole, ribeye and sausage meat to flavor her sauce. Personally, I felt like it was a taste from the past; it conjured images of a little old Italian Nonna, dressed in a head scarf, with arthritic fingers gently simmering the sauce all day long in some village in Sicily. In our hurried frantic lifestyles a dish like this one classifies as a luxury and is definitely one that requires planning, skills and infinite patience. There's no denying that the end results are awesome but you have your work cut out for you once you decide to cook a Sugo. Pam even sends me a cheat sheet, one she's figured out after years of cooking this dish. "Don't use Oregano - it turns the sauce bitter,"tops the list."Don't use cheap canned tomatoes. Try to mix brands of tomatoes. I have discovered over the years that each brand of canned tomatoes has its unique sin. When you blend brands the compliment each other and even out the "issues". I like to mix Cento imported, with the better quality Tutturosso."
The devil is in the details and I tasted it in this wonderfully comforting and yet sophisticated dish.


Pam's Recipe for Sugo:
1 can each tomato puree, crushed tomatoes and whole peeled tomatoes
I extra can of tomato puree ( optional)
1/ 2 cup Olive oil
1/2 medium yellow onion
1 bulb fresh garlic
1 bunch plain Italian flat leaf parsley
1/4 cup Italian bread crumbs
1/4 cup pecorino romano
1/4 lb provolone cheese
2 to 3 hard boiled eggs (optional)
2 raw eggs
1 lb sweet italian sausage links
1.25 lb mixed grind
1 piece of ribeye steak
4 to 6 pieces of bracciole meat
1/2 teaspoon of dried basil
salt and pepper to taste
Extra olive oil for frying
Cooking twine for the bracciole

To make the sauce:
1.In a stock pot, heat the olive oil and saute the onion and 2 cloves sliced garlic. When fragrant add the canned tomatoes and the puree and stir well. Turn off heat and crush the whole peeled tomatoes,add in the
dried basil, stir, reduce the heat and let simmer for about a half hour.
2. Raise the heat and bring the pan to a rapid simmer. Add the raw sausage links and the
3. Sear the ribeye to seal in flavors and place in tomato sauce. Simmer and stir to prevent scorching.Tomatoes are notorious for sticking to the pan and ruining the sauce.
4. While it simmers prepare the meatballs.
To make the meatballs:
Place the bread crumbs and pecorino in the bottom of a mixing bowl and add in the following:
two cloves of minced garlic
mixed grind
2 raw eggs
handful of parsley minced
Mix thoroughly and set in fridge for about an hour ( this helps to blend the ingredients)
Roll into meatballs approx 1.25" in size.
Brown meatballs and let drain on paper towels
Add to tomato sauce and let simmer for an hour stirring occasionally (be gentle when you stir being careful not to break up the meatballs)
5.Prepare the bracciole.
To make the Bracciole
Lay the bracciole meat on a cutting board and pound it flat. Season with salt and pepper and
sprinkle it with minced garlic, minced parsley and small pieces of provolone.
Add 1/2 hard boiled egg to center (optional). Roll up and tie each end closed with cooking twine.
Brown the bracciole in a pan in a bit of olive oil, taking care to only sear it and seal in the juices.
Drain on paper towels and place in sauce.
Let simmer for about an hour, stirring occasionally
Turn off heat, skim oils and fat from the top of the pot.
Serve with your favorite pasta sprinkled with crushed red pepper and fresh basil.